Showing posts with label cheap decor. Show all posts

Wednesday, January 4, 2012

paint chip art

Back in July Jessica Jones of How About Orange posted about using paint chips to make art. There are many versions of paint chip wall art but I liked her geometric triangles the best.


I decided to make one for Michael for Christmas. I grabbed a few paint chips, made a template and started cutting. My triangles looked like they were all the same size but once I started putting them together and found they were not the same size. Close but not exact. It almost looked cool but I knew the imperfections would bug me.


Enter Plan B. I grabbed a 1 1/4" square punch. Punched out a bunch of squares and sliced them in half, corner to corner. Since I only had to make one cut, all the pieces were the exact same size. Whew! The triangles were a different shape then Jessica's but I was okay with that- 'make it your own' and all that. Plus considering the size of the art I was making it was way faster than cutting by hand.


Then came the fun part, making the design. I played around with the triangles until I found a pattern I liked.  I added a second row to check if I liked how the pattern repeated.


Then I prepared my backing paper with some guidelines to keep everything straight. I sprayed the backing paper with spray adhesive and laid out the pattern, keeping the colors completely random.


This part was really quick and it wasn't long before my paper was full!


I put in in a mat and frame I already had and it was done. Michael was really pleased with it and I like that it sort of looks like a mini-quilt.

(uh, just ignore all that crap under the desk. mmm-kay?)

Thursday, April 21, 2011

yarn pillow

I had purchased several skeins of yarn to make yarn eggs but then I realized that Easter is only a few days away. I'm too late to decorate this year! I didn't want all that pretty yarn to sit unused for a whole year so I picked a few spring-y colors...


Cut them slightly longer than the top piece of my pillow...


Sewed over each end and the center to anchor the yarn...


Then stitched back and forth many times with coordinating thread. Trimmed the yarn...


Sewed the back pieces to the front. Turned it right side out and popped in a pillow. Easy peasy!


I'm loving the texture!


Friday, January 21, 2011

valentines 2011

We are ready for Valentines Day!

A lot of the same decorations from last year.

I made the "LOVE" banner February '09 but I still really... wait for it... love it!

Same with the puffy heart garland (which I just realized is totally crooked. Ez keeps pulling on it. I'm lucky he hasn't broken it!) The wreath is new this year. As are the apothecary jars holding m&m's (don't expect those to hang around long!) and decorative red balls.

Also new are these cute hearts. Idea from Martha. I thought they would be a fun project with the kids... not so much. There are lots of steps, many of which they can't help with. They got bored quickly and disappeared upstairs to play.

But the kids are quite taken with the finished product.

Honestly, so am I! They look so pretty in the sunshine.

Happy {early} VALENTINES DAY to you!

Tuesday, January 11, 2011

DIY tufted headboard

This a 'sort of' tutorial because I forgot to take pictures of a few steps. It's pretty straightforward though.

I have wanted an upholstered headboard for ages but lacked motivation to make one. With nighttime feedings right around the corner I decided now was the time.

This was our bed before (on a different wall) we've had it for several years. The bed is from IKEA. I didn't hate it but the headboard was so low it wasn't comfortable to lean against and made nursing a baby pretty awkward.

In theory the hidden nightstands are cool but the casters under the nightstands are so small they don't roll on carpet. You have to have wood floors for them to function properly. Had we known this we wouldn't have purchased the bed since our bedroom is carpeted. I don't like the look of the nightstands being out so we just ended up not using them at all- a lot of wasted space.

We considered selling the bed and buying a simple bed frame and supplies to make an upholstered headboard but in the end we decided to just use what we had. We flipped the flat surface of headboard onto the existing headboard. The pieces were the exact same length and width so it worked perfectly.

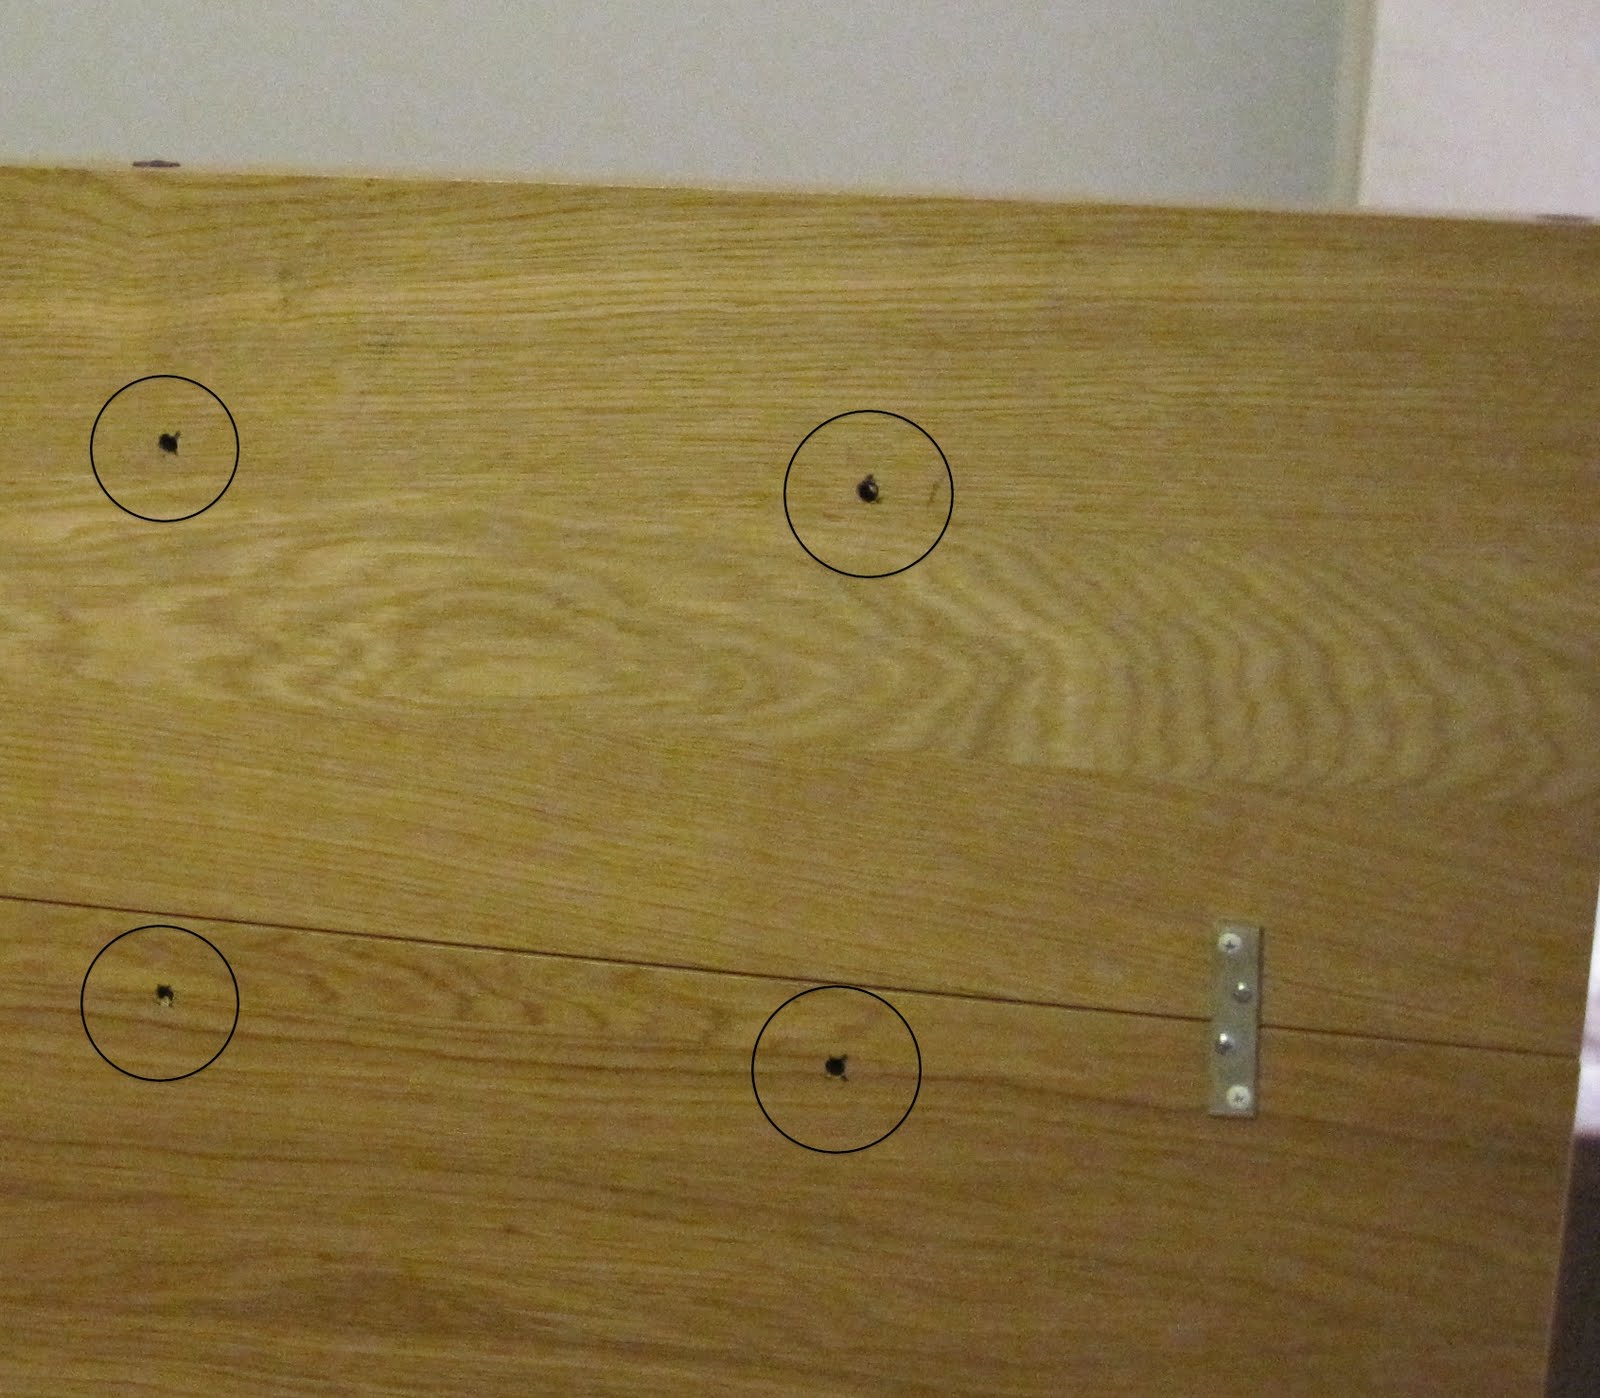
After securing the pieces together I drilled holes for the button tufts using a 1/2" drill bit. Being that the bed was from IKEA and made from something that isn't actual wood, it was incredibly easy to drill the holes.

Here is the back view:

Here is where I got sloppy and forgot to take pictures.

Using spray adhesive I glued a 1" thick foam (24" wide) piece of foam to the front of the new headboard. I then covered the foam with batting wrapping it around the sides and top and stapling it in place with a manual staple gun.

After this point I was stuck. I couldn't find the fabric I had envisioned for the headboard. I couldn't even find anything out of my price range. It was disappointing. One afternoon Michael and I were wandering around Target and he happened to come across a shower curtain on clearance for $5.98. It was barely large enough to cover the headboard but it worked! I wanted something with a little more texture but this was the exact color that I wanted so we went with it.

I wrapped the fabric around the headboard and stapled on the back side starting the the center top and bottom and sides. Continue stapling the fabric pulling taut but not so taut that it puckers or indents the foam and batting.

For the corners I just folded and tucked until it looked right and stapled.

The tufts were a little challenging to get perfectly level and evenly spaced. This is what worked for us. Keeping it level with floor, poke an awl through the hole (from the back) until it is just pushing against the fabric on the front. Put a straight pin right where the awl is. Remove awl. Repeat for all the holes. Using a measuring tape measure the pins for even spacing. Adjust as needed. It may seem like a lot of steps but if the buttons are even slightly off it's very obvious!

Make your buttons. I used 1 1/2" size.

With embroidery floss (cause that's what I had on hand) threaded through a long needle I pushed the needle through the hole making sure it came out in almost the exact spot where the straight pin was. String the needle through the button and then back through the hole (very close to the entry point of the needle) pulling taut. Staple the strings to the back of the headboard a couple of times then pull in the opposite direction and staple a couple of times for extra security.

Repeat.

I am really happy with the results! It is so comfortable to sit against (which is what I am doing as I type this!).
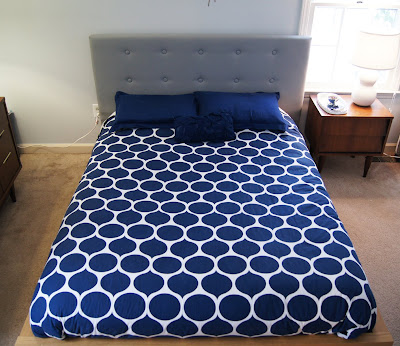

Cost break down:
Foam & batting $20 (purchased during a 40% off sale at Hancock Fabrics )
Fabric $6
Buttons $10

We already had the spray adhesive, staples and embroidery floss.

Total: $36.

Wednesday, October 20, 2010

halloween decor 2010

At this very moment: I am curled up in bed with a nasty head cold. Not ideal timing. My baby turns two this Friday, I have hardly even started the costumes and there is lots of church stuff to attend/prepare for this week and weekend.

Last weekend was great though. I felt good and got much accomplished and I finally finished putting up the Halloween decorations. Halloween is one of my favorite holidays to decorate for. I think it is because I love the color orange!


Many of the same elements from last year. (Side note: One of the things I love about blogging is having a record. I don't remember exactly what my house looked one year ago. I love being able to see the subtle changes from year to year. I wouldn't have that if it weren't for this blog!)


The mantle. My Halloween tree is now three years old. A lot of the branches have been broken in storage. This might be it's last year. :(


New this year: BATS! These would be so easy to make yourself but I went the lazy route this year and let Martha take care of the cutting for me. Isn't she a dear?


The bats lend just the right amount of creepy to the room.


The dining room got just a touch of Halloween too. My favorite part is the pom-pom and pipe cleaner spiders hanging in the windows.

Only 11 days until Halloween! Are you ready?

Friday, August 13, 2010

my favorite pillow tutorial


I love to rearrange furniture but the layout of our family room makes for very limited furniture placement. I am so bored with it but there are no other arrangements that would work. So to freshen up the small space I often make new pillow covers. I use what ever fabric strikes my fancy in the moment but it is usually within my current favorite color combination: navy, aqua and yellow.

I have made many pillows with an envelope back. They are great for one sided pillow designs like the sunshine pillow or the ruffled pillow but for a basic pillow this tutorial from Design*Sponge is the best. Zippered pillow covers are so simple to make. There is really no need to fear the zipper! Zippered pillow covers look nicer and they are double sided. Did the baby spit up on the pillow right before company comes over? No worries, just flip the pillow over! I can't be the only one that does that, right??


I love this navy and white geometric print. It is called "Darcey" by Anna Griffin.

The sizes I made today (13" square and 18"x10") are perfect for cradling little heads during an afternoon movie.

Monday, April 12, 2010

wheat grass


I grew my own wheat grass! I don't know what I am going to do with it though. I have a lot... six pots. I love how it looks. It is so fresh and spring-y. I think I will just keep it in the house for looks.

There are a lot of health benefits to wheat grass but you have to have a special wheat grass juicer. Do any of you drink wheatgrass juice?

It was incredibly easy (and fast) to grow. I followed the directions I found here at Make and Takes. I wish it was as easy to grow grass in my back yard!

After 24 hours:

48 hours:
72 hours:

96 hours:

8 days:


Related Posts with Thumbnails