Showing posts with label before and after. Show all posts

Friday, December 16, 2011

before and after: orange bookcase

In lieu Five Things Friday I am going to show off my pretty new bookcase that I mentioned last week.


I have been craving two things for our main living space; more storage and color. I had decided to buy the expedit bookcase from IKEA. It was fairly inexpensive and would give us the needed storage space even though it's bland and cheaply made. The day before my IKEA run I swung by the Salvation Army nearest my house and found this:


I knew immediately that she was going home with me and I knew just what I was going to do with her! I had just seen this a couple of days previous and loved it. Michael helped me add the vertical pieces. I chose Benjamin Moore oil paint (this piece is going to see a lot of wear and oil is so much more durable than latex) in Tawny Day Lily. It is the perfect reddish orange color (though it appears more red in the photos than it really is).


The bookcase was tagged at $50. I was able to get 10% off. $45 is still a ton of money for me to spend on thrifted furniture but this bookcase was perfect! So much better than the expedit I was planning on spending $70 on. My thrifted bookcase is solid wood and it's longer and narrower than the expedit. It fits in my family room perfectly! With the cost of paint, I spent about the same as the expedit shelves but I got something that is unique and won't fall apart in a year!


On top of the bookcase I have a little teal lamp from Target, a rose votive (Michael bought it for me at a local boutique), two thrifted books- I loved the pretty printed covers, and a little bird- also from Target, a few years ago.


I am really, really happy with it. So happy that I don't want to put anything in it! But this house is lived in. It's not a museum. There will soon be library books and baskets of toys and diapers filling these shelves. As they should be.

Happy weekend!

Monday, December 5, 2011

tissue box makeover

I thrifted this tissue box a few months ago and I finally got around to doing something with it!


I liked the filigree look of the box but I'm not a fan of the brass so I spray painted it a bright, cheery red.


Since the boxes tissues come in are notoriously ugly I wanted to make sure it wouldn't be seen at all while not losing the filigree detail. I bought a piece of white art board for a few dollars at Hobby Lobby and cut it to size. I used a tiny bit of E-6000 glue in the corners to secure the art board.


Now my tissues have a pretty place to reside on my kitchen counter.


It's a silly little thing but it makes me happy!

Friday, April 8, 2011

sprucing up the master bath, part two

If you remember last fall I posted about sprucing up the master bath. This is what it looked like after the sprucing:


I did not expect there to be a part two but my General Contractor brother-in-law Jon wanted to get some practice at making concrete counter tops and asked if he could do one for our bathroom. Um, YES, please!

Jon also made concrete counter tops in his master bathroom (his master bathroom is way nicer than mine. I'm a little jealous!). Side note: Jon and Jen are selling their house so if you are local check it out. It's a lovely house.


The new after:


The crappy white counter top with the built in backsplash is gone and a lovely light gray concrete counter top with a glass tile backsplash is in.


I got lucky and found the glass tiles on clearance at Lowes. I spent only $10!! I did the tiling and grouting. It was my first experience with tiling and I am pretty proud of my work! :)

Tuesday, January 11, 2011

DIY tufted headboard

This a 'sort of' tutorial because I forgot to take pictures of a few steps. It's pretty straightforward though.

I have wanted an upholstered headboard for ages but lacked motivation to make one. With nighttime feedings right around the corner I decided now was the time.

This was our bed before (on a different wall) we've had it for several years. The bed is from IKEA. I didn't hate it but the headboard was so low it wasn't comfortable to lean against and made nursing a baby pretty awkward.

In theory the hidden nightstands are cool but the casters under the nightstands are so small they don't roll on carpet. You have to have wood floors for them to function properly. Had we known this we wouldn't have purchased the bed since our bedroom is carpeted. I don't like the look of the nightstands being out so we just ended up not using them at all- a lot of wasted space.

We considered selling the bed and buying a simple bed frame and supplies to make an upholstered headboard but in the end we decided to just use what we had. We flipped the flat surface of headboard onto the existing headboard. The pieces were the exact same length and width so it worked perfectly.

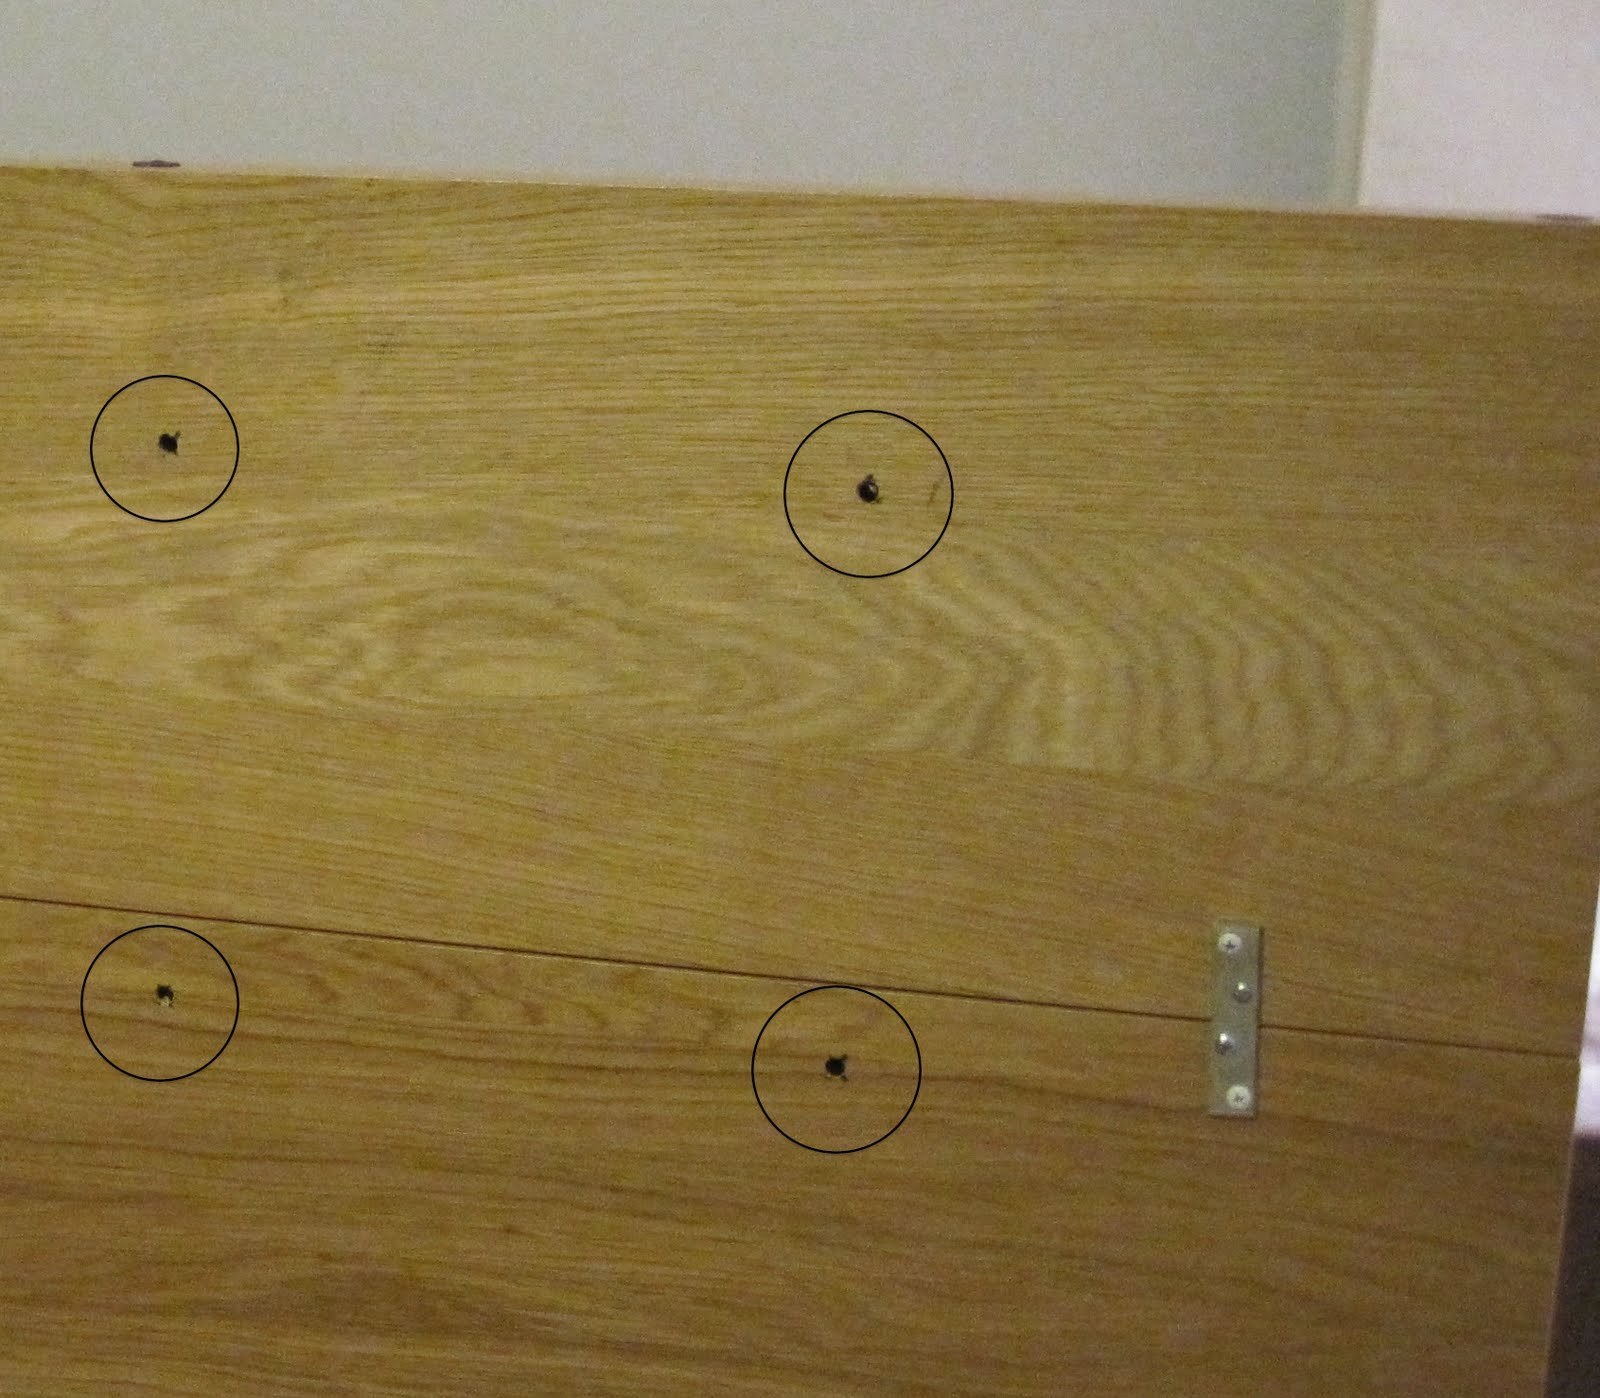
After securing the pieces together I drilled holes for the button tufts using a 1/2" drill bit. Being that the bed was from IKEA and made from something that isn't actual wood, it was incredibly easy to drill the holes.

Here is the back view:

Here is where I got sloppy and forgot to take pictures.

Using spray adhesive I glued a 1" thick foam (24" wide) piece of foam to the front of the new headboard. I then covered the foam with batting wrapping it around the sides and top and stapling it in place with a manual staple gun.

After this point I was stuck. I couldn't find the fabric I had envisioned for the headboard. I couldn't even find anything out of my price range. It was disappointing. One afternoon Michael and I were wandering around Target and he happened to come across a shower curtain on clearance for $5.98. It was barely large enough to cover the headboard but it worked! I wanted something with a little more texture but this was the exact color that I wanted so we went with it.

I wrapped the fabric around the headboard and stapled on the back side starting the the center top and bottom and sides. Continue stapling the fabric pulling taut but not so taut that it puckers or indents the foam and batting.

For the corners I just folded and tucked until it looked right and stapled.

The tufts were a little challenging to get perfectly level and evenly spaced. This is what worked for us. Keeping it level with floor, poke an awl through the hole (from the back) until it is just pushing against the fabric on the front. Put a straight pin right where the awl is. Remove awl. Repeat for all the holes. Using a measuring tape measure the pins for even spacing. Adjust as needed. It may seem like a lot of steps but if the buttons are even slightly off it's very obvious!

Make your buttons. I used 1 1/2" size.

With embroidery floss (cause that's what I had on hand) threaded through a long needle I pushed the needle through the hole making sure it came out in almost the exact spot where the straight pin was. String the needle through the button and then back through the hole (very close to the entry point of the needle) pulling taut. Staple the strings to the back of the headboard a couple of times then pull in the opposite direction and staple a couple of times for extra security.

Repeat.

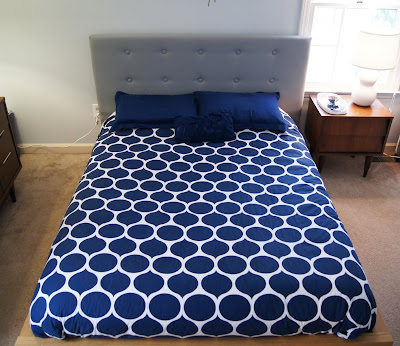
I am really happy with the results! It is so comfortable to sit against (which is what I am doing as I type this!).


Cost break down:
Foam & batting $20 (purchased during a 40% off sale at Hancock Fabrics )
Fabric $6
Buttons $10

We already had the spray adhesive, staples and embroidery floss.

Total: $36.

Monday, December 6, 2010

the hutch

My friend Meredith recently reminded me that I have never "revealed" my thrifted hutch that I painted months and months ago. This is a common problem I have. I sew something, paint something or bake/cook something and plan to blog about it but I just keep forgetting. It gets worse with every year and every pregnancy. Someday I fully expect to forget I even have a blog!

Anyhow, here is the finished hutch:

Here is a reminder of the hutch before:

I was really unsure of what color to paint it. I considered aqua, green or white. I am really happy with the blue I finally decided on. It's Kerry Blue Terrier by Martha Stewart. It goes really well with the dining room curtains which was just luck considering I found the curtain material after I painted the hutch.

I filled the hutch with all my pretty white things. Most of them are thrifted, one gifted, a few from IKEA (the teardrop vases) and a couple from CB2.


This cute bubble bowl is my most recent thrift store find. I love it! $2.

Thanks for helping me remember Mer!

Wednesday, December 1, 2010

before and after: stairs and landing

We are approaching the countdown until baby! Only about six (okay, knowing my body more like eight) weeks left. In preparation for that we have been trying to finish up the million unfinished projects around the house. The biggest one is the stairs and the upstairs landing.

When we bought the house there was a really ugly narrow carpet runner that we immediately removed... and then didn't touch the stairs for the next five+ years. We were distracted with other projects (laying reclaimed wood floors, renovating the kitchen and having babies to name a few) and we were completely unsure of what we wanted to do with the stairs.

Carpet was out because I like the look of wood and sweeping is much easier than dragging a vacuum up and down the stairs. Originally I wanted to wallpaper the risers like this but I couldn't ever get my husband on board. Plus it is more bold than what we usually choose. I was afraid after the expense of the paper and the time of cutting and pasting I would get bored with the look.

So we finally decided to go with a classic look. Dark brown treads and bright white risers.


I am so happy with how crisp and clean the stairs look, especially when compared to the dingy before.


Upstairs the (tiny) landing was more of the same- dingy, beige and more dingy. For some reason I will never understand all the doors, windows and trim in the house were painted a yellow-y beige. I like bright white trim. It feels clean and fresh.


Next up is new carpet. Unfortunately that is not something we can DIY so it may be a while before get that done. Hopefully in the next six months. The wall color is the same as our main living space - Gray Palisades by Valspar. I love this color!


That skinny door straight ahead is a linen closet and the bi-fold door to the left is our laundry closet.


Michael painted the stairs since we used oil based paint. He also removed the popcorn and painted the ceiling because I am a wimp. I painted everything else- the walls, the doors, the trim and I replaced the door knobs. A lot of hours went into this but it was worth it. I am so glad we finally have it done!

Tuesday, September 28, 2010

sprucing up the master bath

I pretty much hate my "master bathroom". I say master bathroom in quotations because while it is technically the master bathroom it is also connected to the rest of the house for use as a powder room.

Other grievances against the bathroom:
-It is incredibly small a fact that is emphasized by the strangely low ceilings.
-There is no bath, only a shower stall. (I haven't had a bath in almost six years!! I do shower regularly though!)
-There is no window and therefore no natural light.

I would love to do a complete renovation on it but that is not in the budget currently and probably never will be! :) So for now I am just trying to make it less ugly.

I didn't take proper before pictures so I dug through my iPhoto and found these pictures from Sutton's first hair cut.


One dark red wall and the rest of the walls primed white. I hated the red from the minute I rolled it on so I never bothered to properly finish the other walls (the plan was to paint them white). It stayed this way for almost five years! I can't believe that we let it be like that for so long but other projects received priority.


It's hard to believe but the red was actually an improvement... when we bought this house the walls were dingy white and had a green and pink rose border like this:


Who am I kidding? The red was hideous! I don't know what I was thinking. Red is a lovely color it just isn't me.

My General Contractor brother-in-law, Jon, came over recently touched up the drywall in bathroom (and lots of other little projects) as a thank you to Michael for building Jon's website. Michael can do drywall but just hadn't gotten around to it. Finally the bathroom was ready to prime and paint!

AFTER:

I used Martha Stewart 'Morning Fog'. I have to say I love Martha Stewarts new line of paint at Home Depot! I have used it on three projects now and I love the colors and the quality of the paint. It has a really nice finish to it and I LOVE that it has low VOC's.

The other side of the bathroom:


The door on the right goes to the hall and the partially visible door on the left goes to the master bedroom. The center door is a closet.


For artwork we have this adorable illustration done by Shai Zagury. My husband bought it for me years ago as a Christmas present. I think he worked with Shai's spouse at the time. I love the simplicity of the illustration.


Michael's grandmother was getting rid of this painting when she was moving from Brooklyn to NC. I love the colors and the texture.


The bathroom is still small and windowless but it feels bigger and lighter. It is amazing what paint can do!
Related Posts with Thumbnails