Don't forget to enter the tote + pouch giveaway- it ends Friday!
I needed to sew another tote bag so I could write up a tutorial. It was the perfect excuse to make a tote for myself, it's been a long time since I have sewn something just for me! I added a sweet little 'W' monogram.

I will probably use the bag primarily for trips to the library, although I did use it for a solo trip to the fabric store last night. I put my cellphone, keys and wallet in the front pockets and my purchases in the main part. It was great not having to carry my big purse/diaper bag and a separate shopping bag.
I used a lighter weight canvas for the body of the bag. The bag is fully lined with a 100% cotton print- Carnaby Street by Robert Kaufman. I bought it years ago at a quilting store that was going out of business.

This tutorial is very flexible. Make the bag wider, bigger, smaller. Make the boxed bottom wider or don't box it at all, leave it flat.
I hope my directions make sense. It's hard to gauge because it, of course, makes sense to me. I could ask my husband but that would be the equivilant of him asking me to code a website. So, if anything doesn't make sense, please ask. I am happy to clarify or help in anyway. As always, if you make a tote send me pictures. I love seeing your projects. In fact, I have been considering jumping on the bandwagon and starting a Flickr group for projects created by you with my tutorials...

On with the tutorial:
Cut out:
main bag pieces- two 18"x18"
lining pieces- two 18"x18"
front pocket piece- 18"x9.5"
contrasting trim- two 18"x4"
contrasting pocket trim- 18"x3"
1" cotton webbing- two 61" lengths

Fold and press the pocket trim piece in half, open it up and fold & press each side to the center crease. Sandwich the pocket piece between the layers. Stitch close to the edge.

Fold and press the bottom edge of each trim piece 1/2". Place the trim piece on top of the front main piece, matching up the raw edges. Stitch near the bottom folded edge of the trim piece. Repeat for the other main piece.

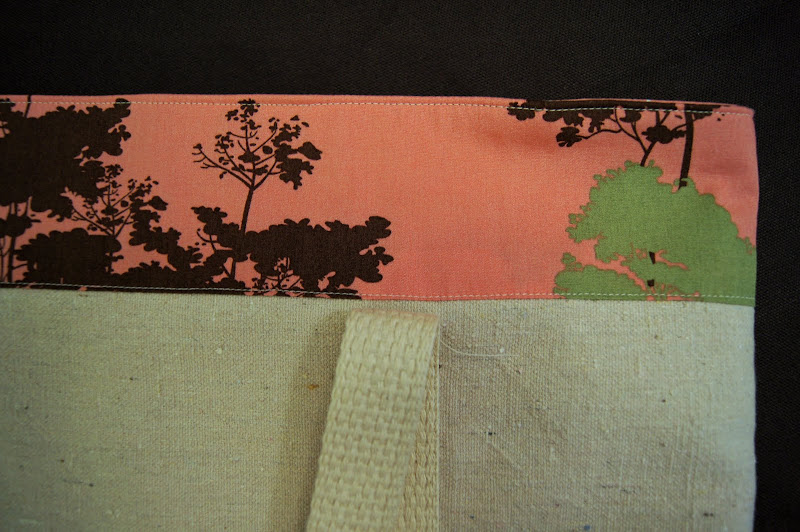
For a tote with three front pockets, layer the strap piece over the pocket on top of the front main piece. Sew down each side of the strap from the bottom of the trim piece to the bottom of the bag- do not sew on the trim piece.
The strap should be 5" in from each edge.

For a tote with just two front pockets (perfectly sized to fit bulky board books), sew the strap directly to the front main piece. Repeat for the back main piece. Again, don't sew the strap to the trim at the top.

Then sew the pocket piece on top of the straps, one stitch down the center of the pocket.

With right sides together, sew around the perimeter of the bag leaving the top open. Before you sew make sure your front and back trim pieces line up, your finished bag will look much better if you do.

To box the bottom of the bag, take one bottom corner and pinch together so the side seam and the bottom seam are lined up. Measure in two inches from the corner (the corner of the seam, not the raw edges), mark and sew. Cut excess. Repeat for the other corner. Turn right side out and press.

Sew the front and back lining pieces together leaving the top open and a 6" opening at the bottom. Box the bottom.

With right sides together, put the lining inside the bag, matching side seams and raw edges. Make sure the straps are tucked in side the tote. Pin and sew.

Using the 6" opening in the lining turn the tote right side out. Press and top stitch around the top of the tote.

Now sew the strap to the trim at the top of the bag. Start where your stitch ended previously and sew + backstitch 2-3 times and the top to reinforce the seam. Continue to the point where your stitch previously ended on the other side of the strap.

Stitch the 6" opening in the lining closed.
Done and done!


8 comments:
Thank you for posting this! It's a perfect bag to make for friends (and myself)! I can't wait to start it!
The monogram is so cool! What a beautiful touch!!! Xoxox
These totes are super cute, I especially love the monogram you did - so fun.
I would like to formally request a tote for my birthday :)
What a great bag to use! Well done.
Thank you! I'm sure it's much more difficult than you make it look, but I'm going to give it a try anyway!
you have such a fabulous blog! i really love this tutorial, the pockets on the front are my favorite part. add it to the project list! haha
Thanks so much for really clear instructions and photos to help explain. It was a pleasure to make as I knew just what I had to do at each step!
Thank you sooo much. This was my very first sewing project. The pictures were great and I was even able to modify it a little because I could see what was going on in the pictures. Thanks again.
Post a Comment
Thanks for leaving a comment. I love 'em! They make me feel special! :)
If you have a question make sure you have an email address linked up to your blogger account or leave your email address in the comment so I can respond otherwise I will answer your question here in the comments section.
OR you can email me at suttongraceblog(at)gmail(dot)com
Note: Only a member of this blog may post a comment.