I have wanted an upholstered headboard for ages but lacked motivation to make one. With nighttime feedings right around the corner I decided now was the time.

This was our bed before (on a different wall) we've had it for several years. The bed is from IKEA. I didn't hate it but the headboard was so low it wasn't comfortable to lean against and made nursing a baby pretty awkward.

In theory the hidden nightstands are cool but the casters under the nightstands are so small they don't roll on carpet. You have to have wood floors for them to function properly. Had we known this we wouldn't have purchased the bed since our bedroom is carpeted. I don't like the look of the nightstands being out so we just ended up not using them at all- a lot of wasted space.

We considered selling the bed and buying a simple bed frame and supplies to make an upholstered headboard but in the end we decided to just use what we had. We flipped the flat surface of headboard onto the existing headboard. The pieces were the exact same length and width so it worked perfectly.

After securing the pieces together I drilled holes for the button tufts using a 1/2" drill bit. Being that the bed was from IKEA and made from something that isn't actual wood, it was incredibly easy to drill the holes.
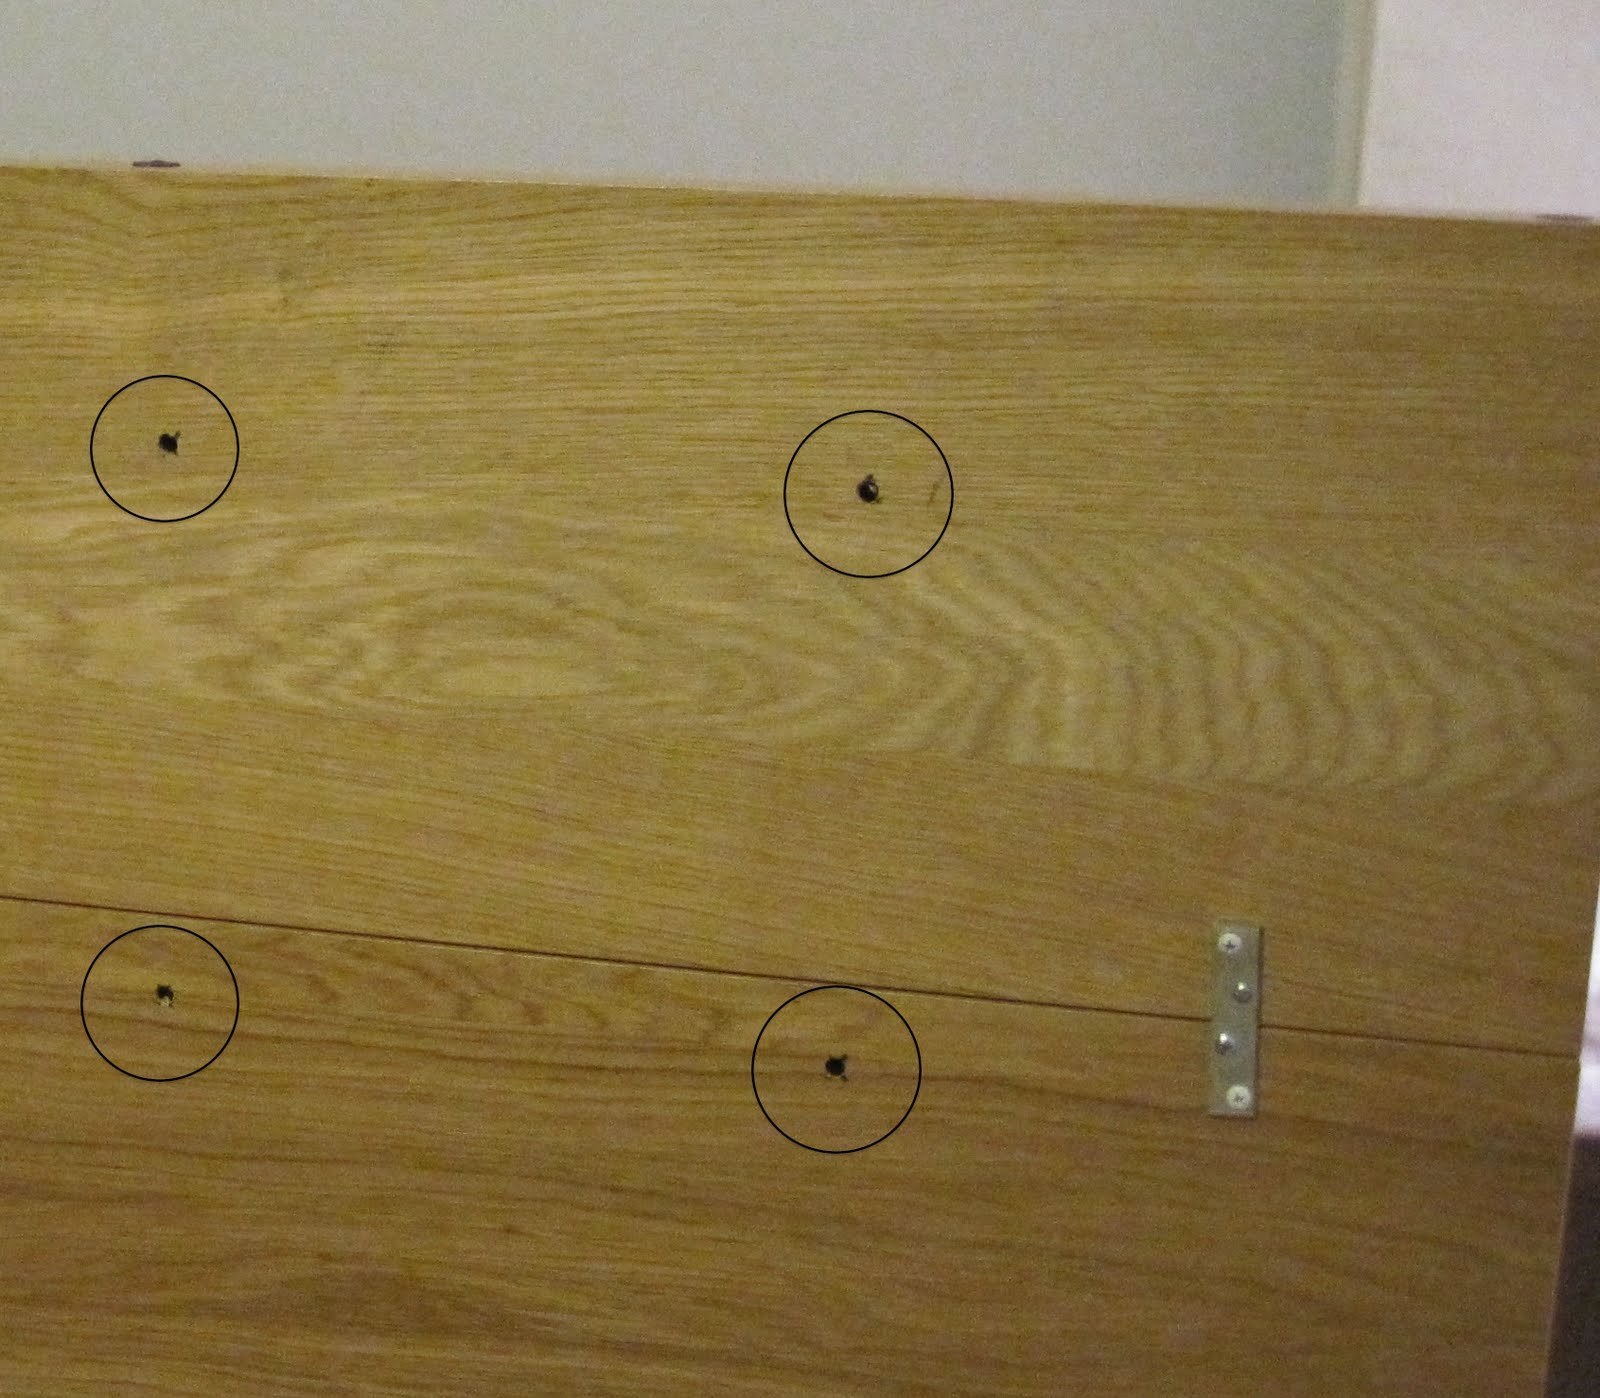
Here is the back view:

Here is where I got sloppy and forgot to take pictures.
Using spray adhesive I glued a 1" thick foam (24" wide) piece of foam to the front of the new headboard. I then covered the foam with batting wrapping it around the sides and top and stapling it in place with a manual staple gun.
After this point I was stuck. I couldn't find the fabric I had envisioned for the headboard. I couldn't even find anything out of my price range. It was disappointing. One afternoon Michael and I were wandering around Target and he happened to come across a shower curtain on clearance for $5.98. It was barely large enough to cover the headboard but it worked! I wanted something with a little more texture but this was the exact color that I wanted so we went with it.

I wrapped the fabric around the headboard and stapled on the back side starting the the center top and bottom and sides. Continue stapling the fabric pulling taut but not so taut that it puckers or indents the foam and batting.
For the corners I just folded and tucked until it looked right and stapled.

The tufts were a little challenging to get perfectly level and evenly spaced. This is what worked for us. Keeping it level with floor, poke an awl through the hole (from the back) until it is just pushing against the fabric on the front. Put a straight pin right where the awl is. Remove awl. Repeat for all the holes. Using a measuring tape measure the pins for even spacing. Adjust as needed. It may seem like a lot of steps but if the buttons are even slightly off it's very obvious!

Make your buttons. I used 1 1/2" size.

With embroidery floss (cause that's what I had on hand) threaded through a long needle I pushed the needle through the hole making sure it came out in almost the exact spot where the straight pin was. String the needle through the button and then back through the hole (very close to the entry point of the needle) pulling taut. Staple the strings to the back of the headboard a couple of times then pull in the opposite direction and staple a couple of times for extra security.

Repeat.

I am really happy with the results! It is so comfortable to sit against (which is what I am doing as I type this!).

Cost break down:
Foam & batting $20 (purchased during a 40% off sale at Hancock Fabrics )
Fabric $6
Buttons $10
We already had the spray adhesive, staples and embroidery floss.
Total: $36.


20 comments:
Ha, that is the exact same brand/style of clearance shower curtains that I just used to redo a project as well. So funny. I think I may have gotten a slightly better deal then you, mine was around 3.00! I still have my yellow curtain just waiting for a project....
The headboard looks amazing. Love the color combo of the grey and blue.
Wow! Your headboard looks so pretty and comfortable! I LOVE that it cost you so little but looks so expensive. It's so awesome that you diy'd it! Amazing!
awesome!! Thanks for posting this :)
Wow.
Your headboard looks great Erin!! I love your bedding and the grey and navy combo.
Woot! Such a great transformation, and you can't beat the price.
That is so cool.
$36!?! It's gorgeous!
Erin, I love this! I also love your duvet. Where did you get that?
Very cool. Looks great. Love how you used the shower curtain. Cheap shower curtains have always been multi use fabric in my book!
I put nice soft rocker next to our bed with our last baby thinking I would wake for night time feeding and actually use it. No, it was so much easier to just sit up in bed. You were very smart to get this done now. Having said that, your killing me with all these big projects. Start acting like your pregnant.
@yellowbird- you did get a way better deal!! i wish there had been more colors. i would have bought a yellow one even for $6.
@Kalleen- I am hoping one of these big projects will bring on labor. Tomorrow is the due date and nothing is happening!!
The duvet is by Jonathan Adler (called Hollywood I think). I love it but it's been on my bed for three years and I am ready for a change!
Have I ever told you that you're amazing?
I'm really grateful you shared this project with your readers. I was able to have pointers here. We'll be trying DIY tufted headboard at home soon.
With respect to our roofing needs, my wife suggested that we'll just find contractors to do it. There are so many roofing contractors (Omaha area). So we figured out it wouldn't hurt to patiently inquire with roofing companies, (Omaha NE-based).
Oh, Erin!
I've been needing to get us a headboard for ages now, and I just can't seem to get myself to get motivated to make one. You make it look so quick & easy, I may just muster up the energy to do it! Your headboard looks absolutely lovely.
That looks awesome!
how many intces did u leave between each button?
I have beed dreaming about this headboard since you posted it. I am going to give it a shot this weekend. LAst year our bed broke and so I built us a new one. The only thing missing is a headboard. Cross your fingers for me that it works!
BRILLIANT idea! Now I will be on the lookout for CUTE shower curtains!
I have made a 3 squares sectional headboard similar to yours that I made with construction foam, which was super cheap. I like your method. I just simply glue gunned the squares onto some scrap flat wood and positioned them behind the bed. It is nice and firm to nurse against, but probably not as soft as yours. Great idea to use the shower curtain!
Post a Comment
Thanks for leaving a comment. I love 'em! They make me feel special! :)
If you have a question make sure you have an email address linked up to your blogger account or leave your email address in the comment so I can respond otherwise I will answer your question here in the comments section.
OR you can email me at suttongraceblog(at)gmail(dot)com
Note: Only a member of this blog may post a comment.